Today, I have a guest post from my father. This is a recipe
that he had told me about but only as a memory from his childhood. We cooked it together a few days ago and I will
certainly be introducing it to the rest of the family. I have found another recipe for this in Copeland Marks', The varied kitchens of India which has a chapter on the food eaten by the Jews of Calcutta. It was almost exactly the same as this one except that he uses tamarind paste rather than vinegar. I wonder if the vinegar was added by my great grandmother and others finding themselves transplanted in England, as an alternative, since tamarind must have been pretty tricky to come by in England in 1941!
Guest post
"My first recollection of the dish called
chittarni which we put together today is specific. It was during
World War II. My Grandmother (Big Granny) was staying with us in Sidmouth,
Devon, where we occupied a flat on the sea front. The dish was a favourite
of Granny's because one of her daughters had cooked some for her at home in
London, and sent it to her by post. It consisted of pieces of
chicken stewed in a smooth and richly spiced onion
sauce to which tomatoes had been added and which is sharpened by vinegar.
The sauce you could tell both preserved and enhanced the chicken. It arrived in
one or two glass jars. I have never forgotten its smell and its
sweet and sour taste. Nor my greed in wanting to eat it then and there as
Granny unpacked her parcel even though I knew that it was meant to be
warmed up and was intended as a treat for her and not for
me. Treats were in short supply in 1941. I have thought of that
day but did nothing about trying to recreate the experience, until I
discovered its recipe in the Sephardi section of Claudia
Roden's brilliantly researched Book of Jewish Food.
Here's how you cook it. You need a lot of onions which slow
cooking melts down - two Kilograms, say six large ones. In the old days
you would grate them or chop them very fine. Fortunately adding the
onions coarsely chopped to a food processor will quickly give
you a large bowl without tears or too much effort. The onions should then
be slowly softened in oil in a large pan with the lid on and stirred from
time. This may take half an hour or more. The onions should on no account be
allowed to brown.
While the onions are cooking prepare the spices. You will
need: several cloves of garlic mashed into a paste, a generous
portion of grated ginger, a teaspoon of turmeric, a teaspoon of
ground cinnamon, 1 and half teaspoons of ground coriander. ground cardamom,
chili powder and a couple of bay leaves. I leave some of these amounts open to
allow for taste preferences. Add these spices and cook slowly for five minutes
stirring from time to time. Add chicken pieces, thighs on or off the bone and sauté for a few minutes.
Now add a can of chopped tomatoes and simmer uncovered for
30 minutes or until the liquid is absorbed. Finally stir in a three of four
tablespoons of wine vinegar according to taste. I find that this sour element
is very important to the final balance of taste. Cook for a further 10 minutes.
It gives me pleasure to think Dear Pippa that the
dish which we had for lunch and which your bother Toby ate the same day
when he came to stay the night, should bring so long a strand of memory leading
to your great grandmother and to a seaside flat in wartime England. A
true family recipe I suppose."
 One of my earliest memories of childish independence was
being allowed to walk with my brother to a parade of shops about five minutes
away from our house. There was a little
bakery/café at the end of the parade called the Alpina. Run by a smiley Swiss women, I remember cuckoo clocks, pine tables, benches and pictures of snowy alps. Did the staff wear lederhosen and have long
blond plaits? Probably not, but for the purposes of my memory they certainly
did. Hot chocolate and apple strudel was my order
of choice. It never occurred to me to
try and construct a pastry of such complexity as an apple strudel, layers flaky,
crunchy and chewy all at the same time.
It never occurred to me, that is, until I bought a book for Giselle when
she was about six. “Cooking with kids” by Linda
Collister. It not only had a recipe but had
one of those wonderful step by step set of pictures. I realised that maybe this cake was not
beyond me. A few weeks ago I found
myself driving through my old town, the parade of shows is still there and to
my utter amazement so was the Alpina.
Next time I am down that way I will be paying a visit. This is how I
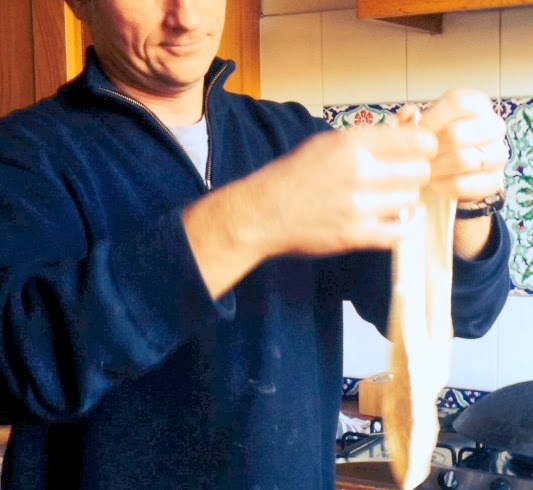
make apple strudel.
One of my earliest memories of childish independence was
being allowed to walk with my brother to a parade of shops about five minutes
away from our house. There was a little
bakery/café at the end of the parade called the Alpina. Run by a smiley Swiss women, I remember cuckoo clocks, pine tables, benches and pictures of snowy alps. Did the staff wear lederhosen and have long
blond plaits? Probably not, but for the purposes of my memory they certainly
did. Hot chocolate and apple strudel was my order
of choice. It never occurred to me to
try and construct a pastry of such complexity as an apple strudel, layers flaky,
crunchy and chewy all at the same time.
It never occurred to me, that is, until I bought a book for Giselle when
she was about six. “Cooking with kids” by Linda
Collister. It not only had a recipe but had
one of those wonderful step by step set of pictures. I realised that maybe this cake was not
beyond me. A few weeks ago I found
myself driving through my old town, the parade of shows is still there and to
my utter amazement so was the Alpina.
Next time I am down that way I will be paying a visit. This is how I
make apple strudel. 

.JPG)